The Garden Sketch That Starts with a Viewpoint
A garden sketch from one fixed viewpoint makes proportions and relationships easier to see, helping you shape a useful rough plan before adding detail.
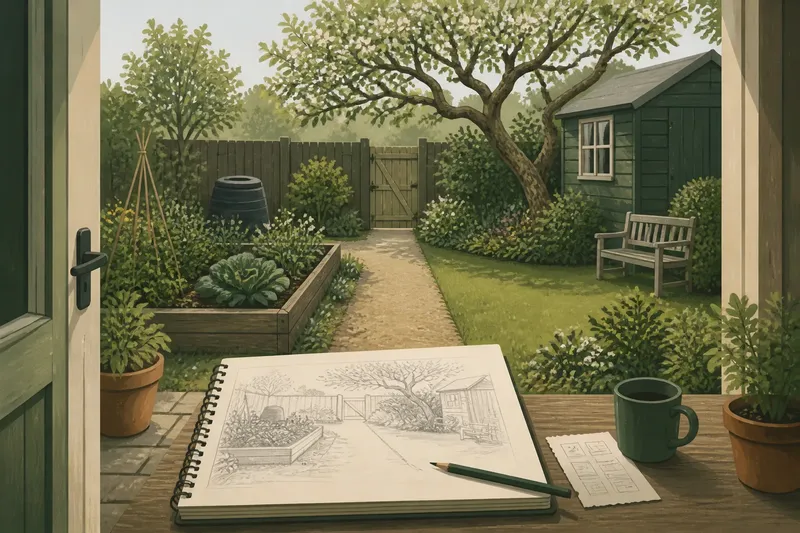
You stand beside the kitchen door with a pencil and a scrap of paper, looking toward the far fence. From here, the raised bed overlaps the compost bin, the path narrows as it recedes, and the old apple tree sits just left of the shed. A garden sketch made from this fixed viewpoint can hold those relationships on the page before individual leaves and pots distract you.
The aim is not to draw a perfect picture. It is to choose one place to look from, keep that position, and note how the garden’s main forms sit in relation to one another. These six decisions help turn an uncertain first sketch into a useful record of what the eye actually sees.
1. Choose a viewpoint with a clear reason
A viewpoint is the specific place from which you observe the garden. It might be a doorway, a gate, a favorite chair, or a spot where two paths meet. Choose it because it frames something you want to understand: the route from the house to a shed, the relationship between a tree and a seating area, or the way a boundary closes the view.
Stand naturally rather than leaning around a post or stretching to see a hidden corner. If you usually look from a chair, use the chair’s seated view; if you want to study the entrance, stand where a visitor would pause. The change in height and angle can alter which edges overlap, so the viewpoint should match the question behind the sketch.
Mark the spot in a way you can find again, such as “center of patio door” or “left side of the gate.” That small note matters if you later want to compare another drawing. A viewpoint is useful when you can explain why you picked it.
2. Fix your position before drawing
Once you have chosen the spot, avoid drifting sideways as you look from object to object. Even a small shift can make a tree appear to move away from a shed or reveal a gap that was hidden a moment earlier. Those changes are real from the new position, but they make a single sketch harder to read.
Use an existing edge as a physical reference. You could align yourself with the center of a doorframe, a paving joint, or a fence post. If the view is open and has no clear marker, place a small object on the ground beside your shoes and stand in the same relation to it while you sketch. Do not obstruct a path or create a tripping hazard.
Keep your head at a comfortable, consistent height. You do not need surveying equipment; the purpose is simply to stop the viewpoint from changing while you compare shapes.
3. Find the largest shapes first
Before drawing a plant, look for the broad forms that organize the scene: the ground plane, a long boundary, a large tree canopy, a shed, a broad bed, or an open patch of lawn. Lightly place these shapes on the page. At this stage, a bed can be a simple block and a tree a rounded mass.
Think of the page as a small window. Decide where its top, bottom, and sides fall in relation to the view, then place the major shapes within that frame. The goal is not to include every corner of the garden. It is to preserve the arrangement that is visible from this particular spot.
Look for the shape of empty space as carefully as the shape of solid objects. A gap between a bench and a hedge may be the route through the garden; an open triangle beside a bed may make the scene feel spacious. Marking that gap prevents the sketch from becoming a collection of objects with no shared setting.
4. Compare proportions through visible relationships
Proportion means the apparent size of one form compared with another in the view. Instead of guessing the shed’s height in feet, ask how it compares with the tree beside it. Does the roofline sit below the canopy? Does the bed occupy about as much horizontal space on the page as the path? These comparisons preserve what the eye sees without requiring measurements.
Overlapping edges are especially helpful. If the tree trunk partly hides a fence post, draw that relationship clearly. It tells a reader of the sketch which form is in front, and it helps keep distant and near shapes from collapsing into one another.
Distance also changes apparent size. A path that seems to narrow toward the gate may be a real design feature, a viewing effect, or both. For this sketch, record the appearance rather than trying to correct it into a plan view. A view sketch describes what one position reveals; it is not a substitute for a measured layout.
5. Use a few anchors to keep the sketch steady
An anchor is a recognizable point that helps you place other forms. It could be the corner of a shed roof, the base of a lamp post, the top of a gate, or the point where a path meets a bed. Choose a small number of anchors and lightly mark their positions before filling in the larger outlines.
Then compare each shape with an anchor: the bench begins below the window, the tree crown rises above the fence, or the path edge meets the bed near the gatepost. These observations are more useful than vague labels such as “large” or “far away.” They connect one part of the drawing to another.
Imagine you stand at a back door and want to see whether a new bench would feel tucked into the garden or exposed. You lightly sketch the doorframe, the shed roof, and the tree trunk as anchors, then place a simple rectangle where you are considering the bench. From this fixed view, the rectangle overlaps the open lawn but leaves the path visible; that observable relationship gives you a clearer question to consider before moving any furniture.
6. Add only details that explain the view
When the main forms feel settled, add details that clarify their identity or relationship. A few strokes can show a gate opening, a low wall, a branch that blocks a window, or the edge of a container that projects into the path. Skip leaf patterns, individual flowers, and surface textures unless one of them changes how the scene reads.
Use a simple visual code if it helps. A solid line can represent a clear edge, a broken line a partly hidden boundary, and a light wash of pencil marks a mass of foliage. Keep the code consistent within the drawing and explain unusual marks in a small note. The sketch should remain readable without becoming a finished illustration.
Write down the date or season only if it helps explain what is visible, such as a deciduous tree being bare or a temporary container occupying the patio. That note separates a lasting relationship from a seasonal one without asking the drawing to carry every detail.
What can a fixed-view garden sketch tell you?
Can one viewpoint show the whole garden?
Usually it shows only the parts visible from that position, and that limitation is useful. The sketch records how those parts relate in a real view, while hidden areas can be left out or noted as unseen rather than guessed.
Should I draw in perspective?
Use the perspective you can observe, but do not worry about formal rules or perfect vanishing points. If a path appears narrower in the distance, show that change lightly and keep the nearby and distant edges distinct.
What if the garden changes with the season?
Keep the viewpoint and basic outlines, then add a short note about temporary features such as foliage, a planter, or a closed gate. If a seasonal change strongly alters the view, a second sketch from the same spot can make the contrast clear.
When is a second viewpoint useful?
Use another viewpoint when the first hides a relationship you need to understand, such as how a path connects to a side gate. Treat it as a separate sketch with its own marked position instead of combining both views into one confusing drawing.
Keep the first drawing open to revision
A rough garden sketch is a record of attention, not a verdict on the garden. Leave some lines faint, keep the viewpoint note beside the page, and circle any relationship you want to check from another position. If the proportions look uncertain, return to the marked spot and compare the same anchors again rather than adding decorative detail.
For a garden sketch that starts with a viewpoint, the most useful mark may be the one that shows what overlaps, what stays open, and where the eye travels. Once those relationships are clear, later decisions about planting or placement have a more honest visual starting point.